

How To Set Up Google Conversion Tracking
Browse This Article:
- Google Ads Conversion Tracking Video Tutorial
- Set-Up Conversion Tracking with Google Analytics
- Fix-Upwards Conversion Tracking with Google Tag Managing director
- Shopify Conversion Tracking with Google Ads
Setting up conversion tracking in Google Ads is vital for entrada success. You can drive sales, leads, and engagement by creating or importing your conversions directly into your Google Ads account.
You can spotter our video below and read the corresponding article to learn more than. Whether you are trying to bulldoze sales for an due east-commerce website, leads for your service concern, or phone calls for your local business, you lot can practise all of those things using Google Ads.
Google Ads Conversion Tracking
You can watch our video below or watch it straight on YouTube.
There are a variety of methods to rail conversions dorsum into your Google Ads account. We go through some more options below. You can utilize Google Analytics or Google Tag Manager, depending on what y'all are the most comfy with. In add-on, you can as well use the Google Ads pixel to gear up-upward conversions directly in your account.
Employ Google Analytics for Conversion Tracking
If you use Google Analytics for tracking, you will be able to create Goals in your Google Analytics account and import them direct to your Google Ads account.
First, you need to start by linking your Google Analytics and Google Ads accounts. That will permit you to import Goals directly from your Google Analytics account into your Google Ads account.
Stride 1 – Linked Accounts in Google Analytics
Go to your Google Analytics account, go to the Admin screen, under the Property section, look for Production Linking and click on the 'Google Ads Linking' link. Click the 'New Link Group' button to brand sure your accounts are linked.
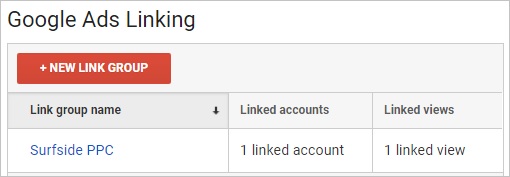
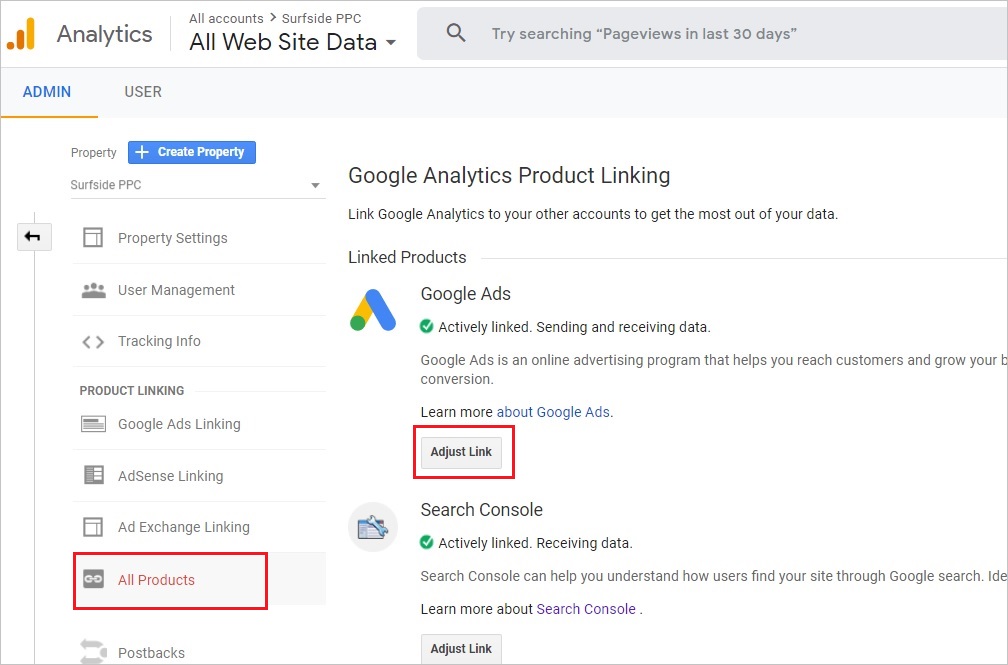
You can 'Arrange Link' if needed past clicking on the 'All Products' link.
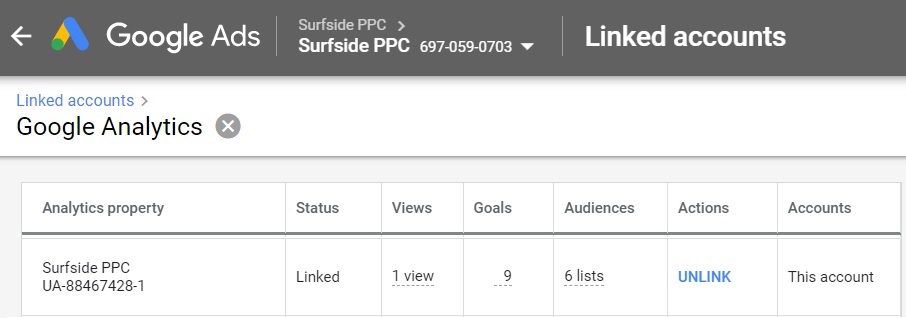
Step 2 – Linked Accounts in Google Ads
Go to your Google Ads account, click on Tools & Settings on the tiptop bar, so click on the 'Linked Accounts' link from the dropdown carte. From there, you can make sure that your accounts are linked together.
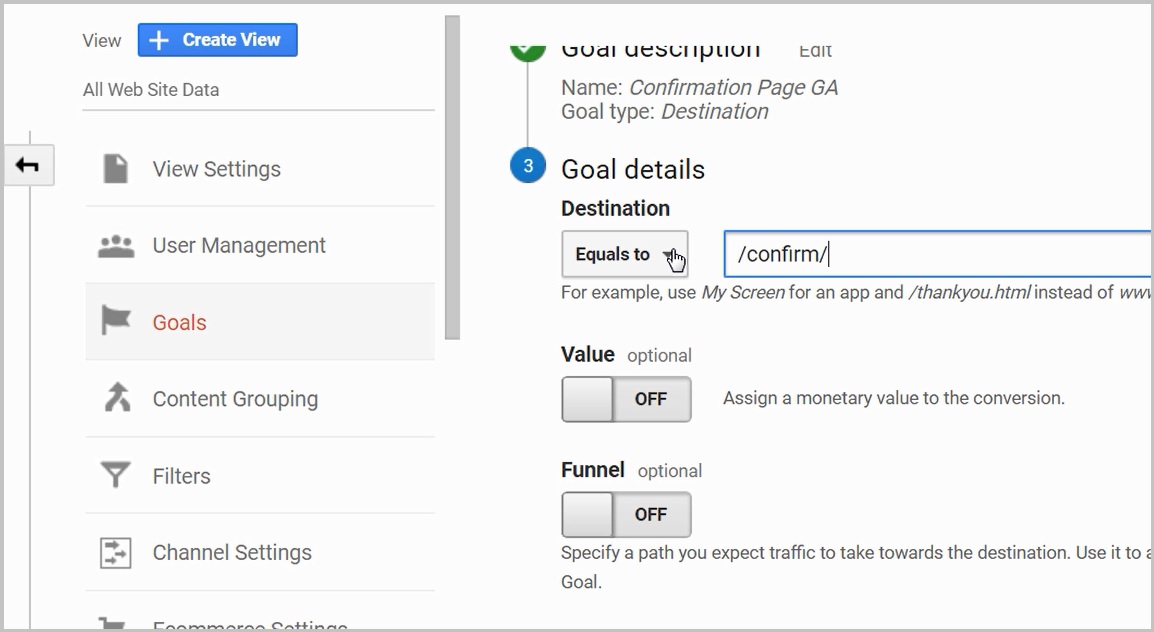
Step 3 – Create a Goal in Google Analytics
Next, you want to go to your Google Analytics account, click on the Admin screen, and click on the Goals link. From there, you lot can create a new Goal that volition be tracked in your Google Analytics account.
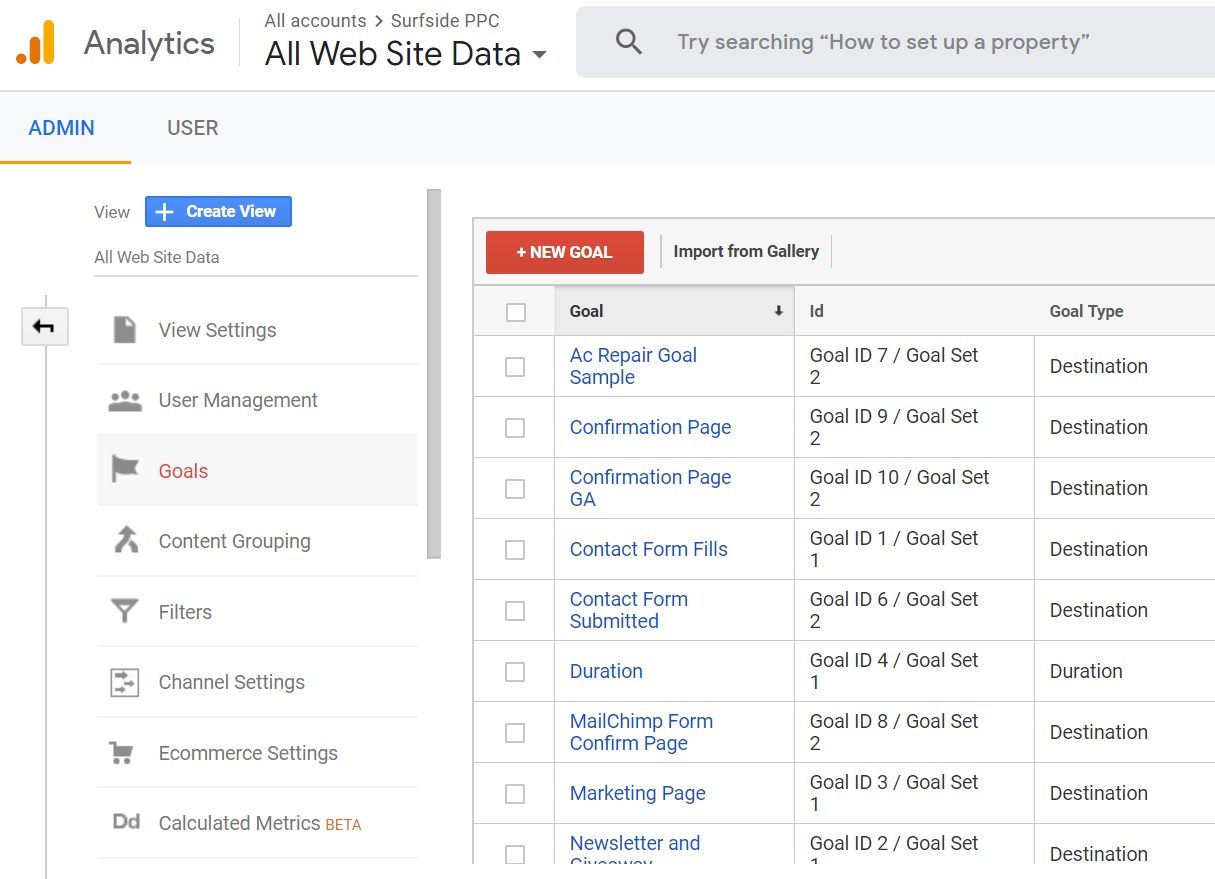
You tin create Goals every time someone reaches a buy confirmation, newsletter confirmation, or any type of give thanks you page on your website.
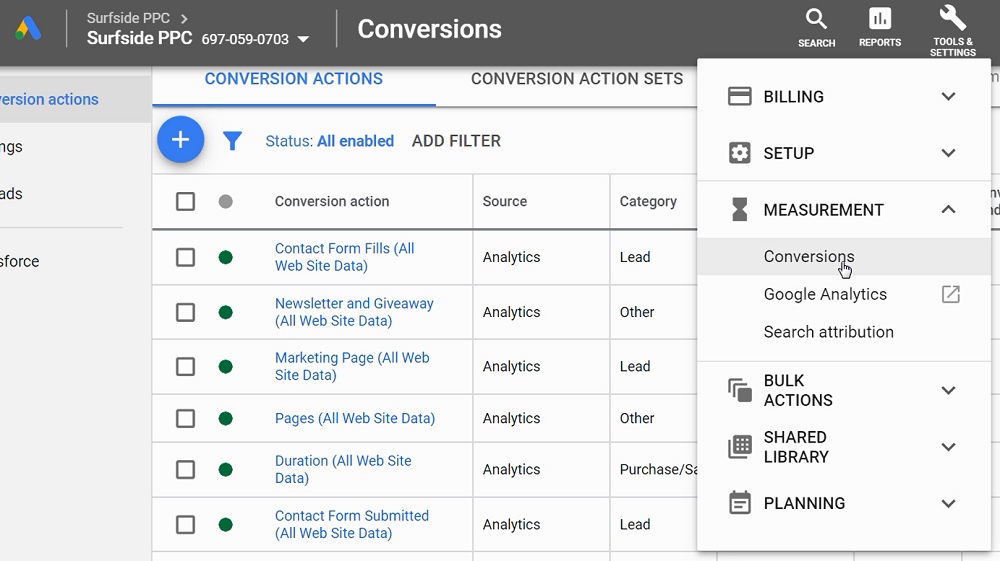
Step 4 – Go To Your Conversions Page in Google Ads
One time you have your goal created, you desire to navigate to your Google Ads business relationship. Click on Tools & Settings on the superlative bar, and click on the 'Conversions' link.
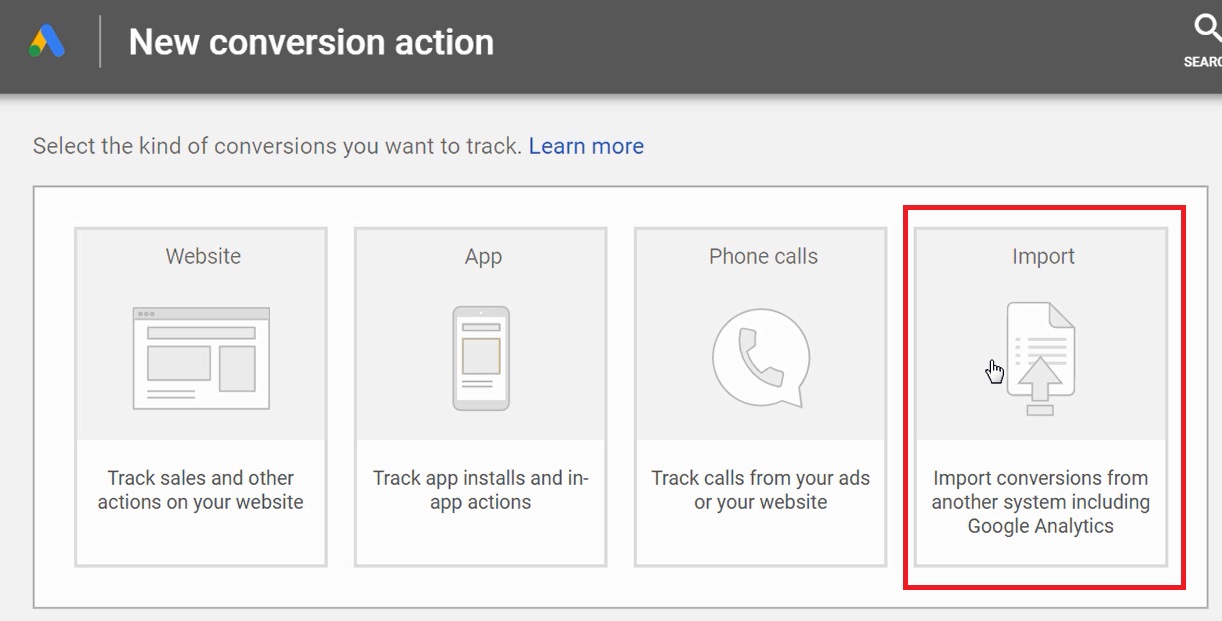
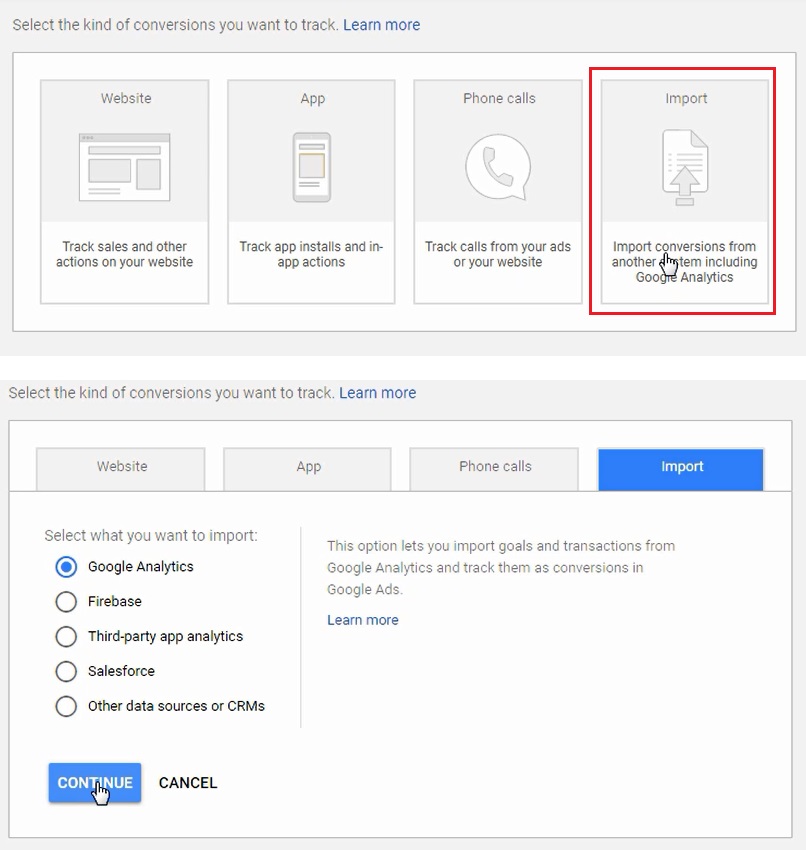
Step 5 – Add together a New Conversion and Cull Import
There are different means to include fundamental actions into your Google Ads account, but for this, we will be using the import selection.
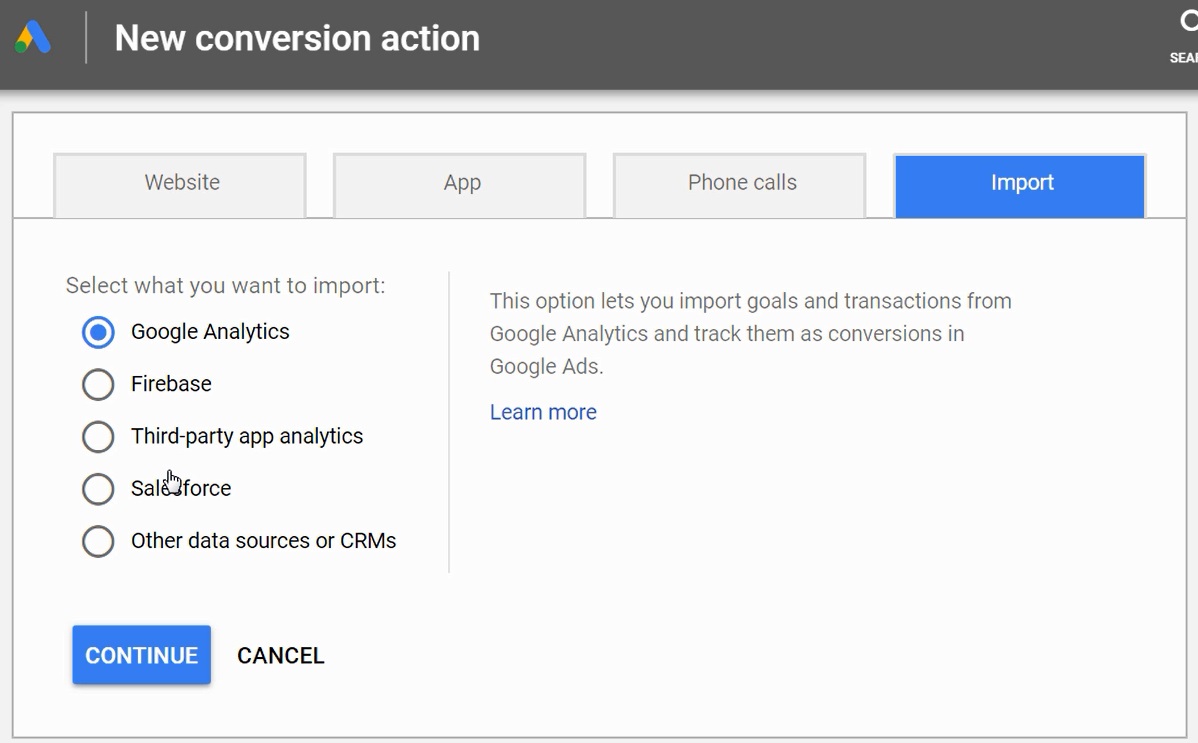
Step 6 – Cull Google Analytics
Since the Goal was just created is in our Google Analytics account, we will now connect with that account and import the conversion into Google Ads.
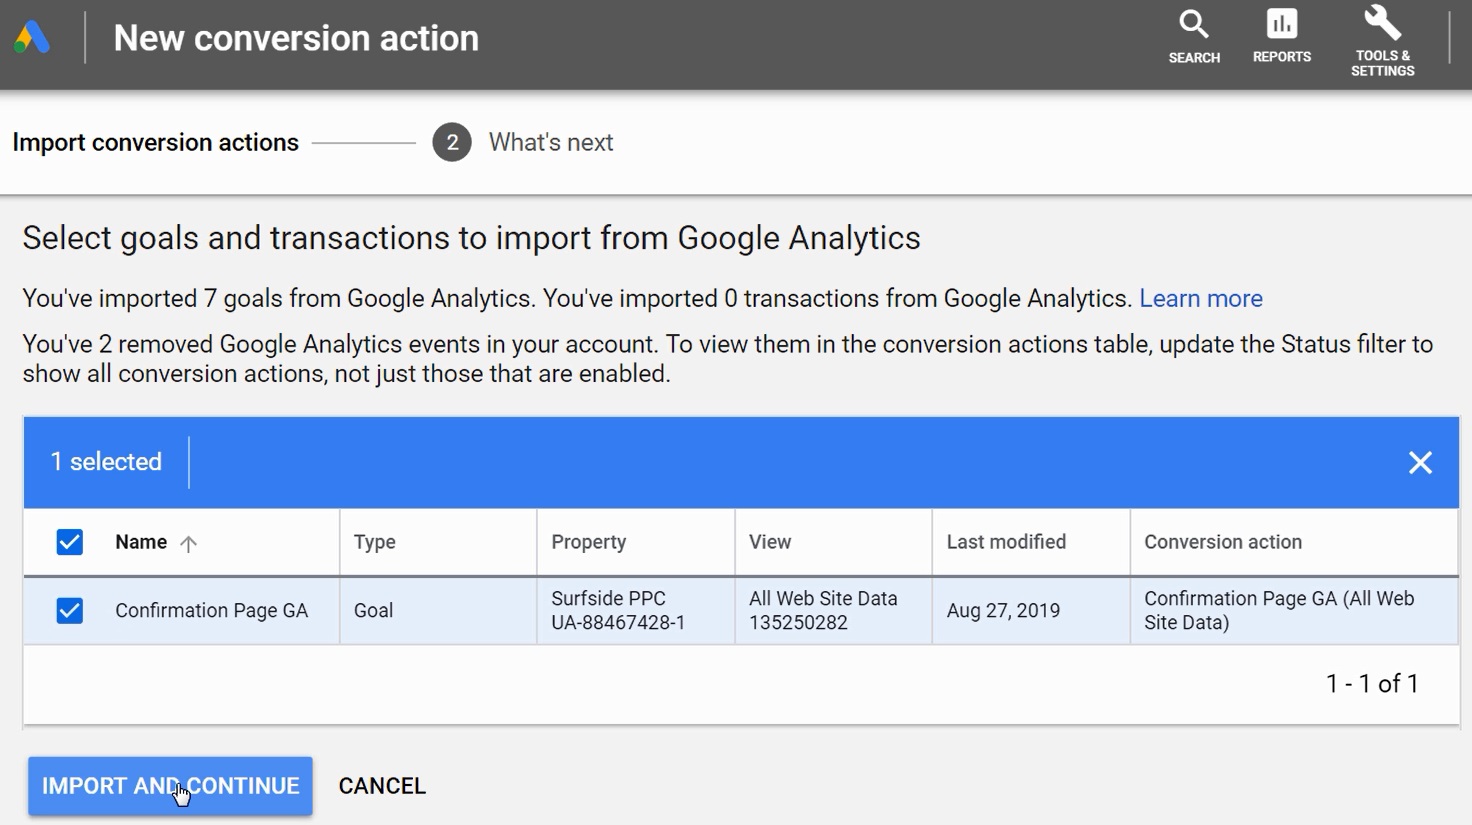
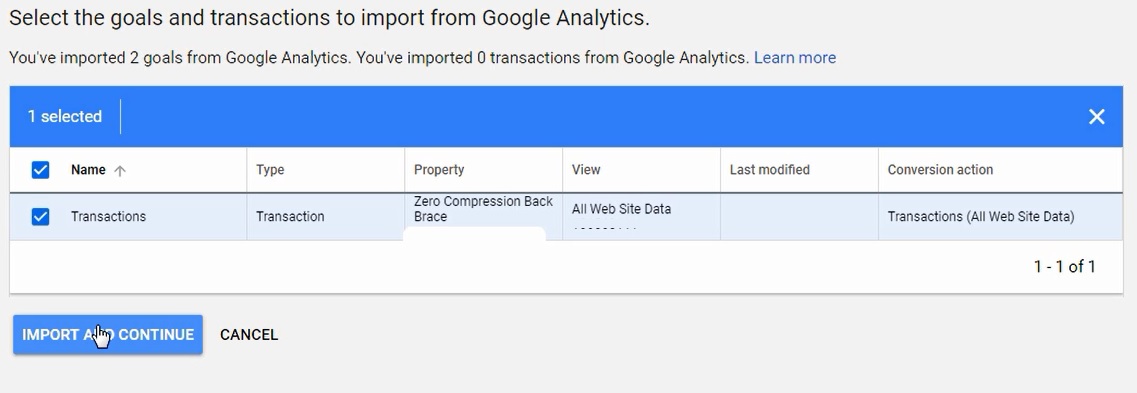
Step seven – Import Conversion into Google Ads
In one case you lot import the conversion from Analytics, you can now rail key conversions back to your Google Ads campaigns.
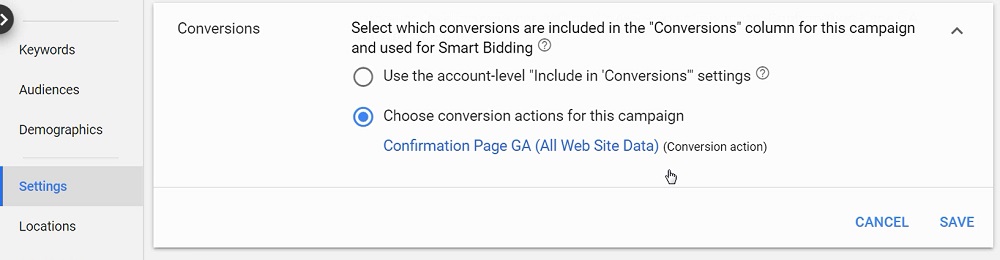
Step 8 – Optimize For The Conversion in Entrada Settings
Open up the entrada in Google Ads that y'all will exist running. Click on the 'Settings' link for your campaign on the left-mitt side. Then, scroll downwardly to 'Conversions' and either employ all the Conversions in your account, or choose a specific conversion-action.
Employ Google Tag Manager for Conversion Tracking
Step one – Install Google Tag Manager on your Website
First, y'all need to make sure you accept Google Tag Manager installed on your website. I similar to employ Google Tag Assistant, which is a Google Chrome extension that will make sure Tag Manager is installed on your website.

How to Install Google Tag Director on WordPress
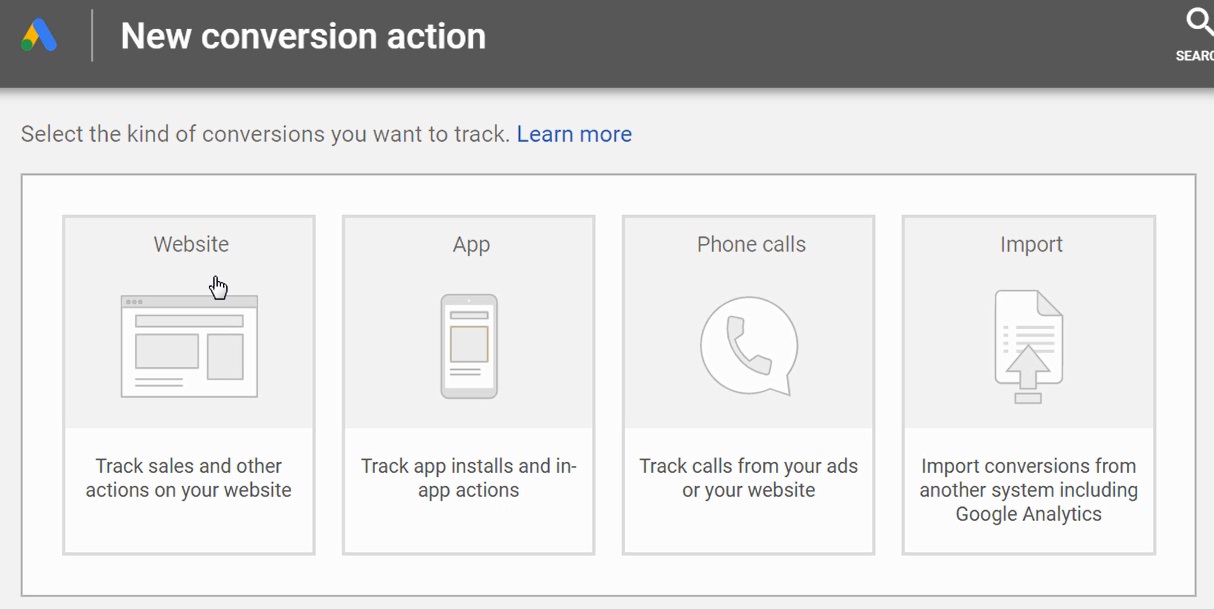
Step two – Create a New Conversion in Google Ads and Choose Website
Next, you need to go to your Google Ads account, click on Tools & Settings, click on 'Conversions', and create a new conversion. You lot want to choose a 'Website' conversion during this step.
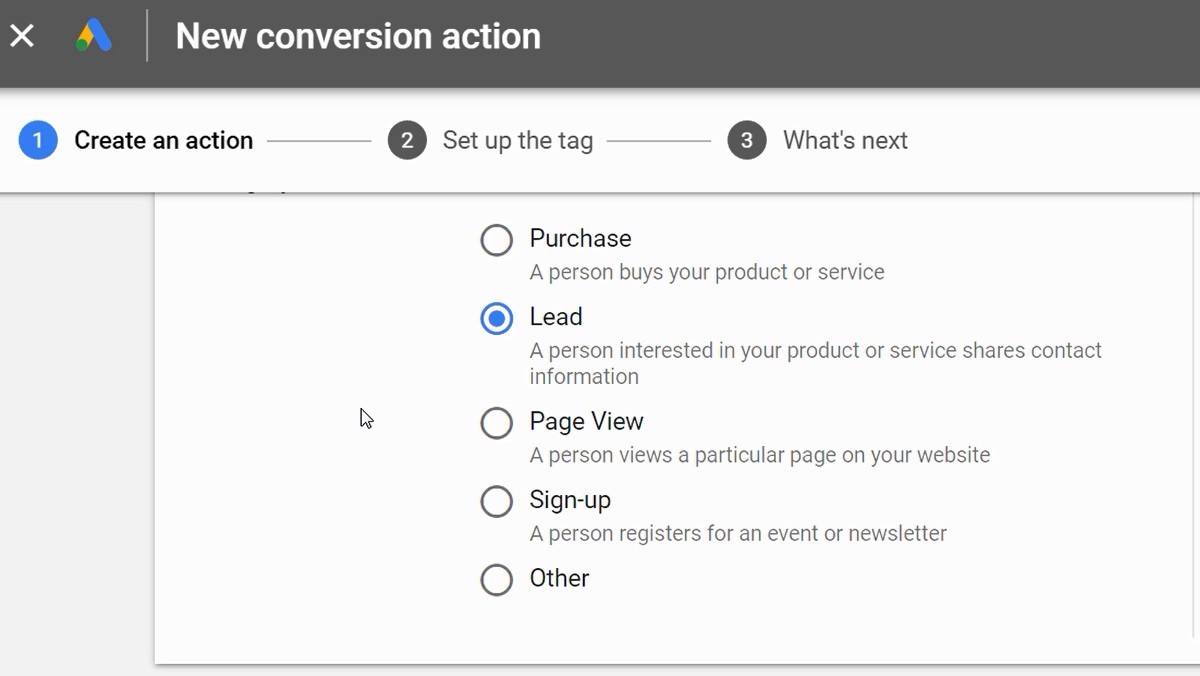
Step 3 – Create Your Conversion
Go through the process of choosing a category, naming your conversion, setting a value, and more than. This footstep is likewise chosen 'Create an activity' in Google Ads.
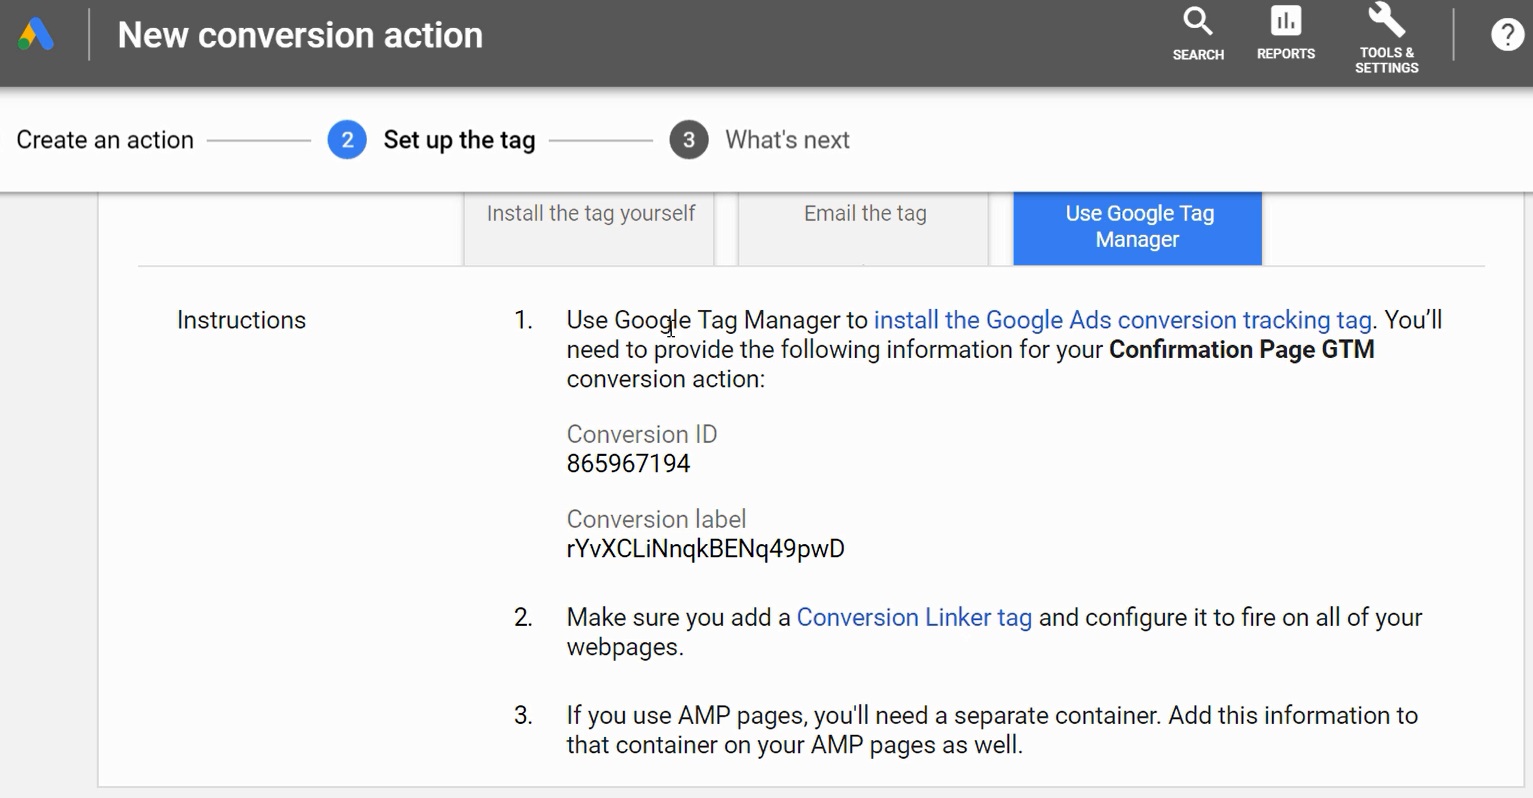
Step four – Set The Tag with Google Tag Manager
Y'all tin install the tag yourself or you can choose Google Tag Manager. In that location will be a step-by-step process shown one time yous select GTM during this stride.

The master things you will need in order to gear up-up your tag are the Conversion ID and Conversion label. I will cover the Conversion linker pace below.
Step 5 – Create New Tag in Google Tag Managing director
Become dorsum to your Google Tag Manager account and 'Add a new tag' in your account.

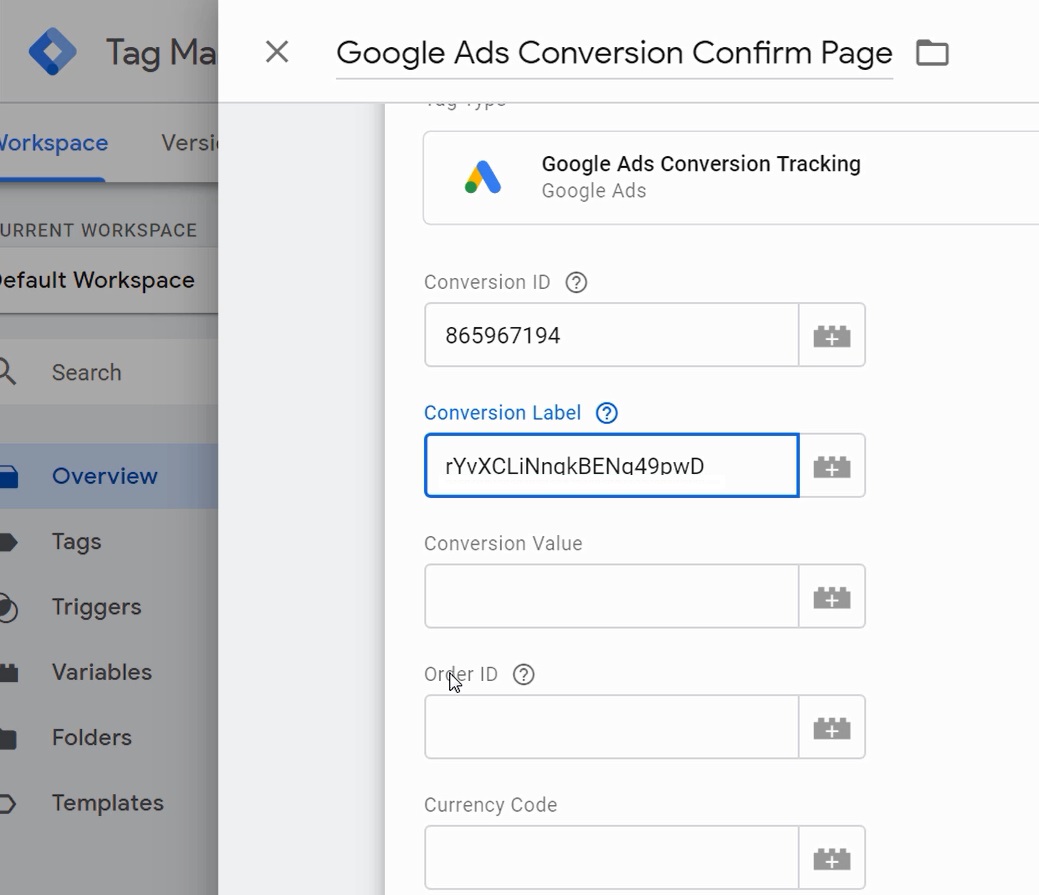
Footstep half dozen – Create a Google Ads Conversion Tracking Tag
Cull the proper tag from the list and now yous can brainstorm to configure your tag.

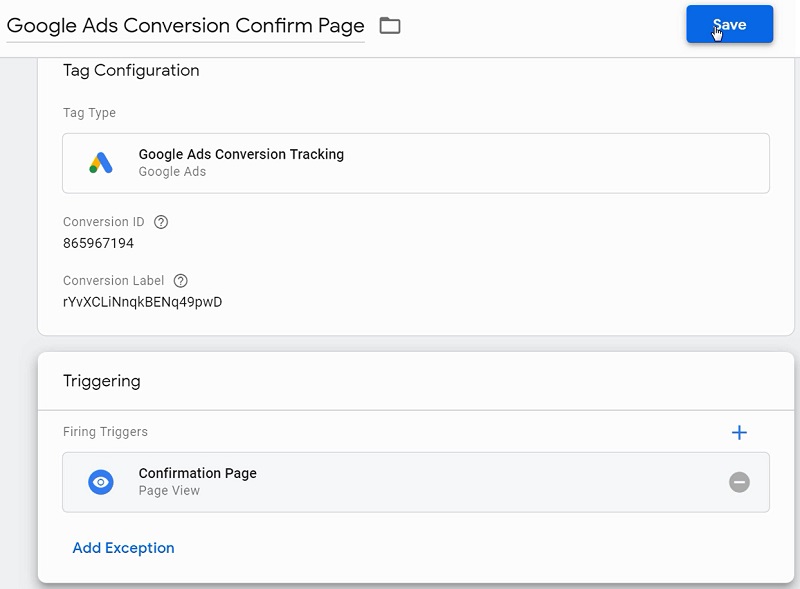
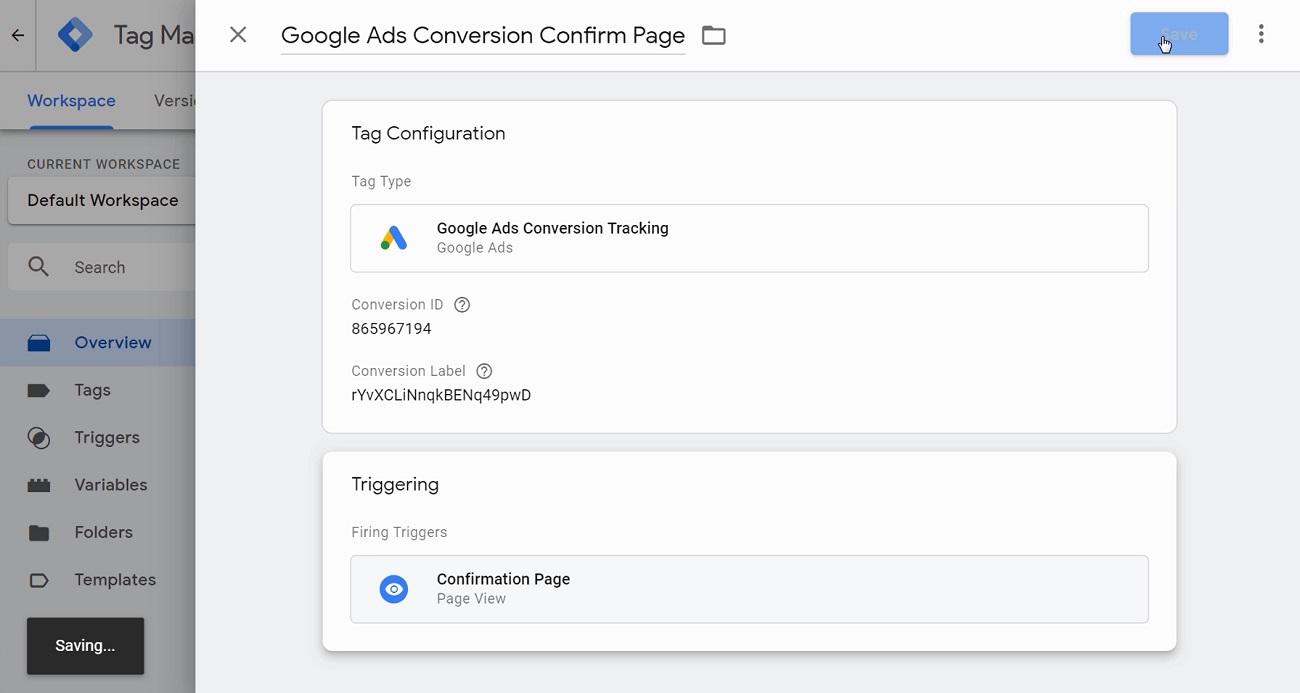
Step 7 – Enter Conversion ID and Conversion label
You can find your Conversion ID and label from footstep 4 higher up. You want to put them in the proper fields so you can runway the Google Ads conversion using Google Tag Manager.
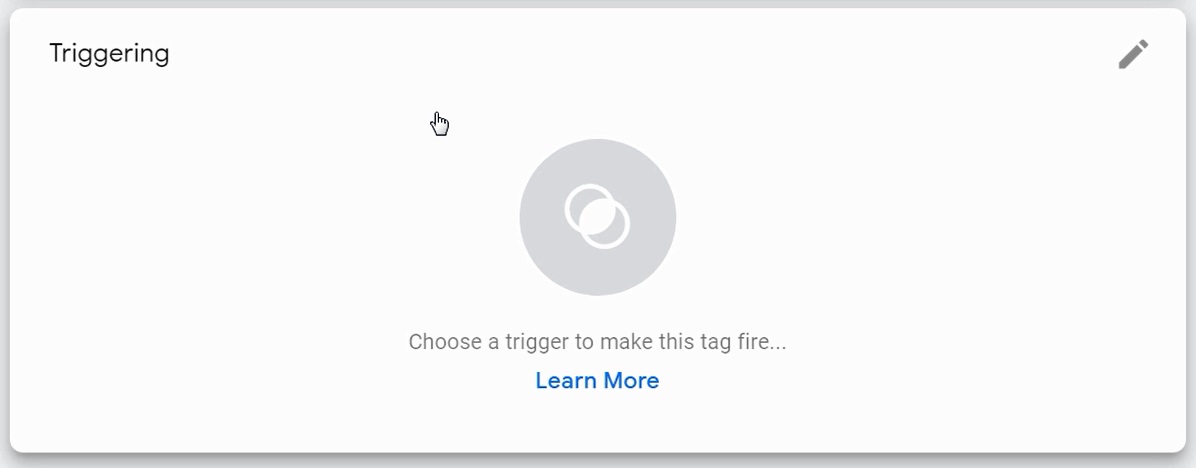
Step viii – Cull When To Trigger Your Tag
In one case you have your tag created, yous demand to choose when that tag will trigger in Google Tag Manager.
When yous 'Choose a trigger' you desire to click on the plus-sign (+) in the top right corner.
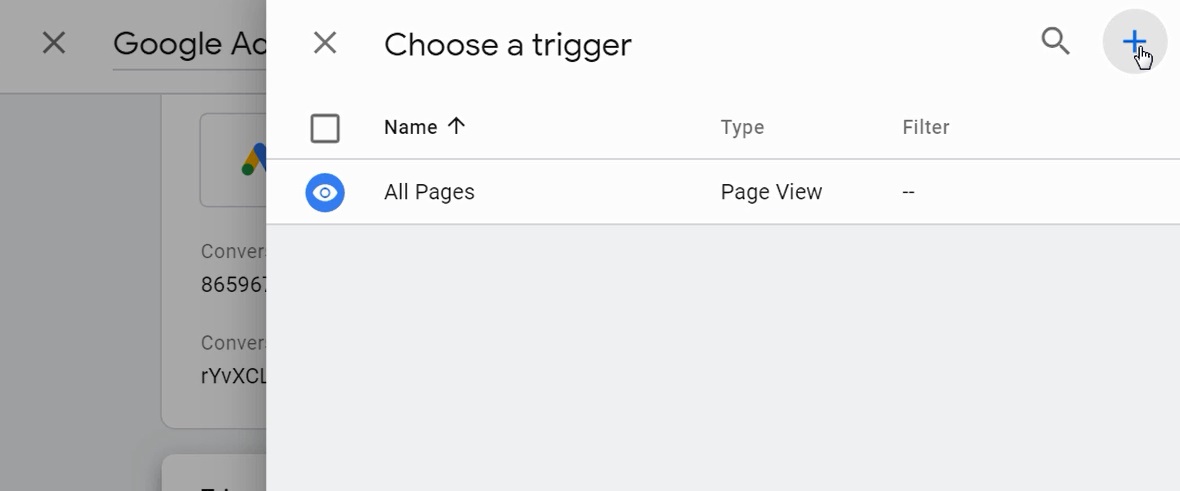
For this instance, nosotros will be triggering our tag on a specific Page View. There are other options you can choose as well when y'all need to trigger a conversion tag.

Next, you lot will desire to trigger your tag on 'Some Page Views' and y'all can enter when people hit a sure Page URL on your website. For example, when the Page URL contains '/ostend/' you tin count a conversion.

Then, click on the Save push button to prepare your trigger.
Finally, click on the Save button to create your new Google Tag Manager tag. The tag you lot prepare-upward will be used to track a conversion every time someone hits a central page on your website.
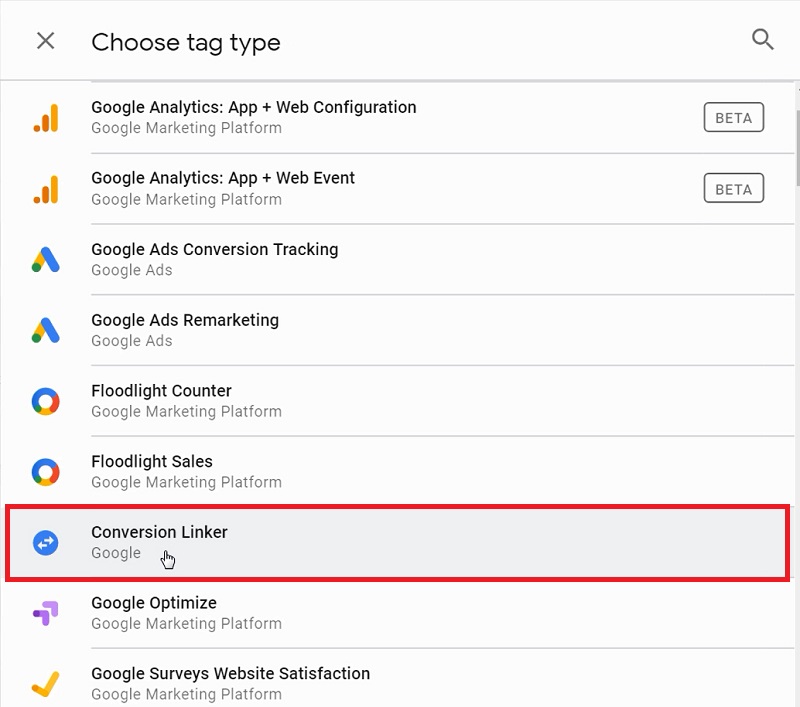
Step 9 – Add The Conversion Linker Tag
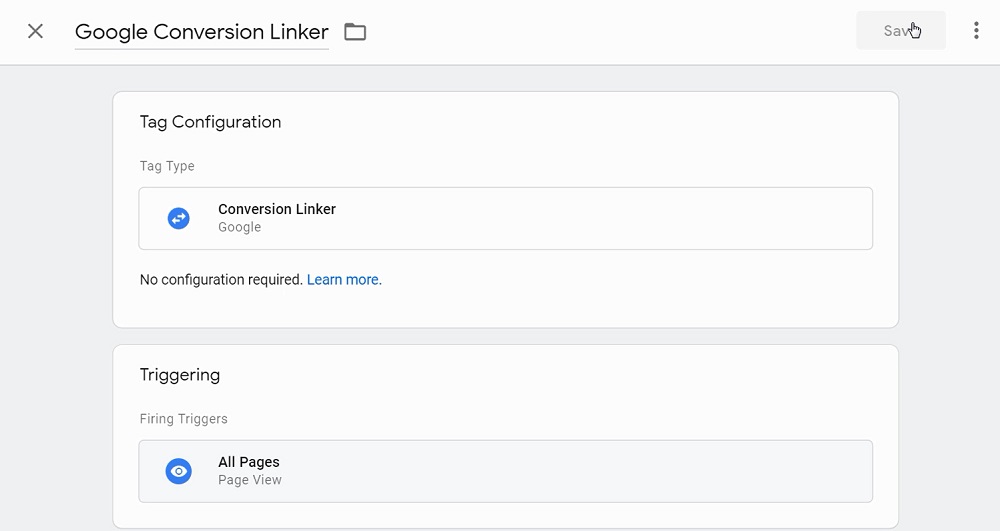
You will need to create a conversion linker tag that fires on all of your pages. In Google Tag Manager, click to create a new tag, and cull 'Conversion Linker' from the options listed.
Set the conversion linker tag to burn on each Page View for All Pages on your website. And so, click on Save to create your new tag.
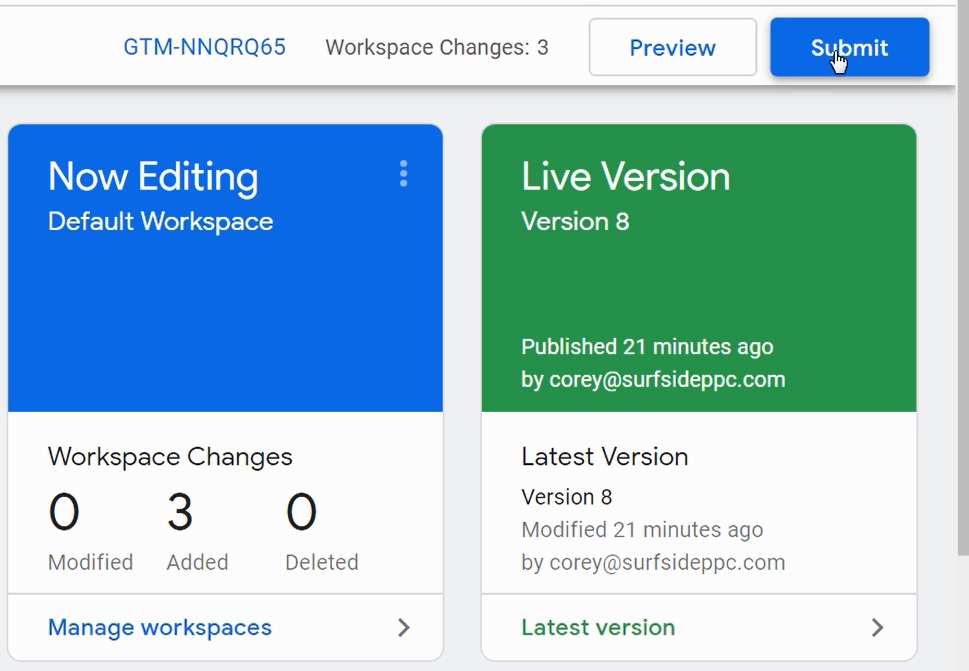
In order to publish your tags, you need to click on the 'Submit' button. Once you click on Submit, Google Tag Manager volition be able to track your Google Ads Conversion Tag and your Google Conversion Linker tag.
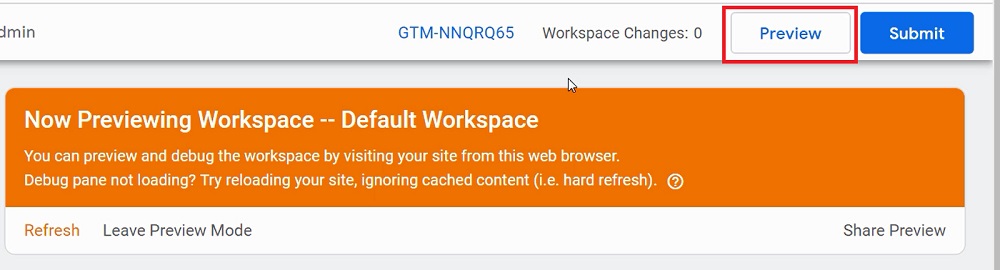
Next, you can click on the 'Preview' button to put your website and Google Tag Managing director into preview mode. Preview mode allows you to see all the tags that are firing on your website and on key pages on your website besides.
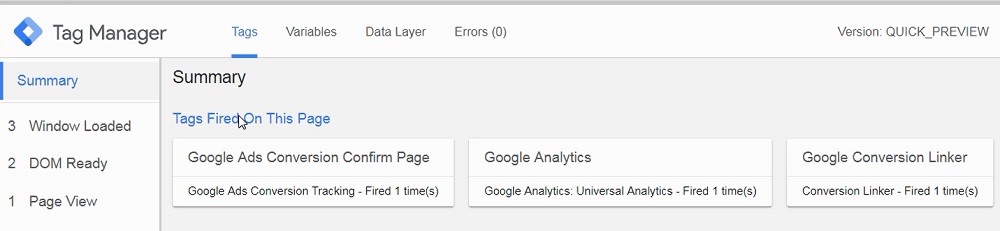
Lastly, you lot can go to your website to make certain that your Google Ads conversion tag is firing on your Thank Y'all page or your Confirmation page.
Google Ads Shopify Conversion Tracking
Yous tin spotter our video beneath or picket it directly on YouTube.
In order to get started, you will demand a Google Analytics business relationship for your Shopify website and a Google Ads account.
Footstep ane – Add together Google Analytics ID to Shopify
Go to your Shopify Admin department for your website, click on 'Online Store' on the left-mitt side, and become to the Preferences folio. From there, you desire to enter your Google Analytics Tracking ID and you lot want to click the box to 'Utilize Enhanced Ecommerce.'
Y'all can find your Google Analytics Tracking ID by going to your Google Analytics Admin screen, clicking on the 'Tracking Info' link, and clicking on the 'Tracking Lawmaking' link from the dropdown menu.

Stride two – Add Google Analytics ID to Shopify
Next, get to your Google Analytics Admin screen and click on 'Ecommerce Settings.' Turn on 'Enable Ecommerce' and 'Enable Enhanced Ecommerce Reporting', then click save.
Turning on these settings volition track Transactions and Revenue into your Google Analytics account when you get to the Conversions > Ecommerce > Overview report.

Stride 3 – Link your Google Ads and Google Analytics accounts
In order to import your Transactions into your Google Ads account, you need to link your Google Analytics business relationship. In Google Analytics, go to your Admin screen and click on Google Ads Linking to make certain your accounts are linked. In Google Ads, go to your Tools & Settings menu, so click on Linked Accounts to make sure your accounts are linked.

Step 4 – Add a New Conversion in Google Ads – Import from Google Analytics
In your Google Ads account, go to your Tools & Settings bill of fare, then click on the Conversions link. You want to click on the plus-sign to add a new conversion.
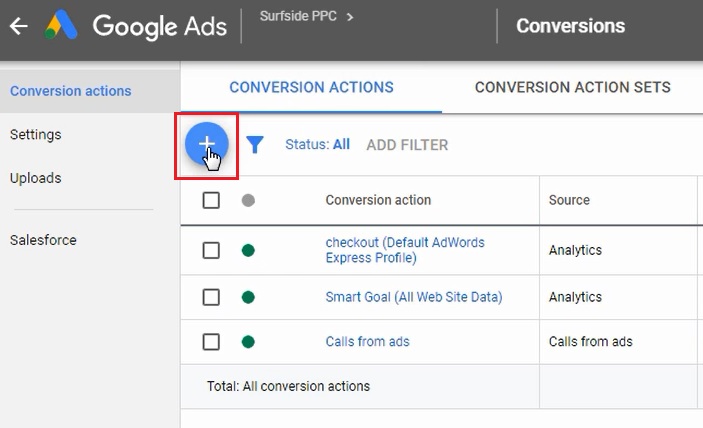
Choose to import the conversion first, and import the conversion from Google Analytics.
Import 'Transactions' from your Google Analytics account. One time yous exercise that, your transactions will be tracked in your Google Ads and Google Analytics accounts.
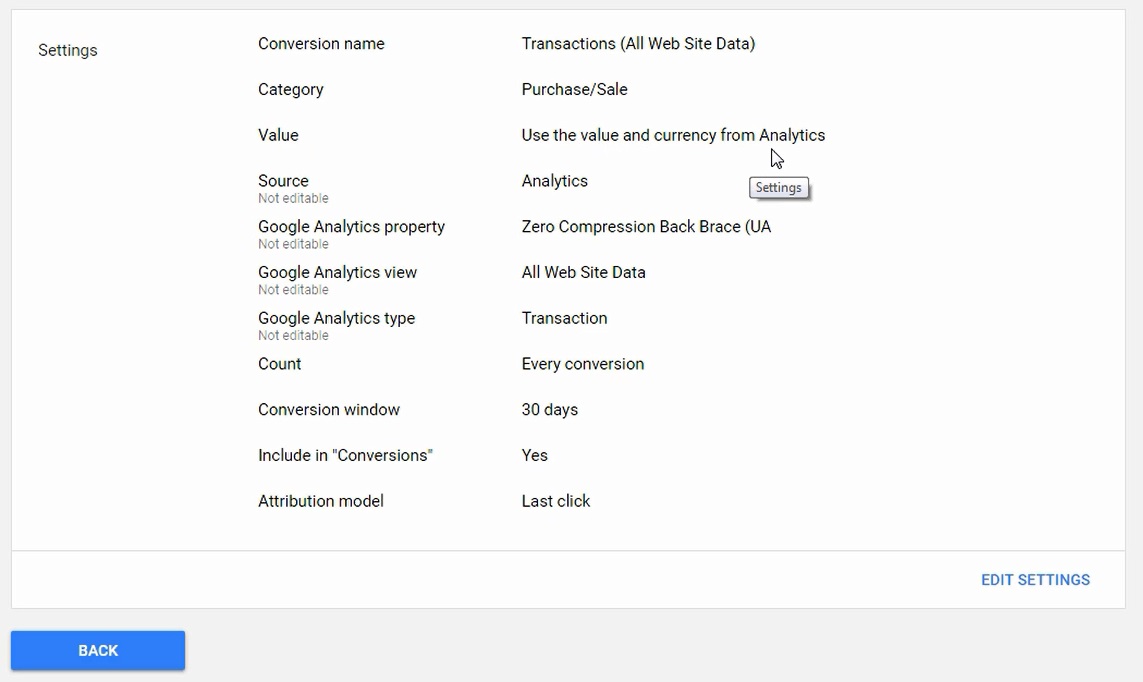
Step five – Choose Conversion Settings
Y'all desire to make sure 'Include in Conversions' is set to Yep and then your campaigns volition track Transactions. In addition, you can choose to 'Utilise the value and currency from Analytics' to track conversion value into Google Ads as well.
In one case you complete this step, you lot are prepare to create Google Ads campaigns that volition optimize for conversions for your Shopify website.
In Summary
If you still have questions almost tracking conversions in your Google Ads account, go out them in the comments. There are different ways yous tin can track your fundamental performance indicators and optimize your campaigns for them. If I didn't cover them in the videos and the article, I will be happy to aid y'all solve whatever tracking errors.
Source: https://surfsideppc.com/google-ads-conversion-tracking/
0 Response to "How To Set Up Google Conversion Tracking"
Post a Comment